Koninklijke Philips N.V. commonly known as Philips is a Dutch multinational conglomerate company that was founded in1891 by Eindhoven. Since 1997 the company has moved its primary headquarter to Amsterdam, while it’s the first headquarters is still working in full function in Eindhoven. One of the largest electronics companies that have made its name by offering functional and innovative products. Creating a line of ranges that match everyday function and form.
What started as a lightbulb production house, currently employed 80’000 people in more than 100 countries. Today Philips is focused on three main divisions – Personal Health (Domestic Appliances and Consumer Electronics), Connected Care, and Diagnosis & Treatment.
Philips might be a high-ranking company, but from time to time customers have complained about system errors. Fortunately, most of these errors can be fixed on your own. So rather than ignoring the error codes, your appliance is showing its time to note down the Philips coffee maker error code and get to the bottom of the problem. To help you out we have listed down the most common error codes of Philips Coffee Maker.
Espresso Machine 4000 Series
Below you find a list of the error codes showing problems that you can solve yourself. Support videos are available on www.philips.com/coffee-support. If another error code appears, please contact the Philips Consumer Care Center in your country. For contact details, see the warranty leaflet.
| Error Code | Solution |
|---|---|
| 01 | The coffee grinder is blocked. The coffee exit duct is clogged. Switch off the machine. Clean the coffee exit duct thoroughly with the handle of the measuring spoon or a spoon handle. Then switch the machine on again. |
| 03 | There is a problem with the brew group. The brew group is dirty or not well greased. Switch off the machine. Rinse the brew group with fresh water, let it airdry and then lubricate it. Then switch the machine on again. |
| 04 | There is a problem with the brew group. The brew group is dirty or not well greased. Switch off the machine. Rinse the brew group with fresh water, let it airdry and then lubricate it. Then switch the machine on again. |
| 05 | There is a water circuit problem. There is air in the water circuit. Switch off the machine. Make sure you insert the water tank into the machine properly. Check if the water tank compartment is clean and free from coffee beans. Then switch the machine on again. |
| 14 | The machine is overheated. This can have several causes. Switch the machine off and switch it back on again after 30 minutes. |
| The machine is in DEMO mode. | You pressed the standby button for more than 8 seconds. Switch the machine off and then on again with the main switch on the back of the machine. |
| The machine does not switch on. | The machine is disconnected or the main switch is in the 'off' position (0). Check if the mains cord is inserted correctly. |
| The 'coffee grounds container full' icon remains displayed. | You emptied the coffee grounds container while the machine was switched off. Always empty the coffee grounds container while the machine is switched on. If you empty the coffee grounds container when the machine is switched off, the coffee cycle counter is not reset. |
| The AquaClean filter icon does not appear on the display after I replaced the filter. | You did not confirm activation in the machine menu. Confirm the activation of the filter in the machine menu. (see 'Activating the AquaClean filter') If the display shows 'START CALC CLEAN', you first need to descale the machine. Remove the AquaClean filter before descaling and reinsert it afterwards. |
| The AquaClean filter is installed, but the descaling message appears. | You have not activated the AquaClean filter in the machine menu. First descale the machine and then install a new AquaClean filter. This will reset the filter counter to 0/8. Always confirm filter activation in the machine menu, also after filter replacement.. |
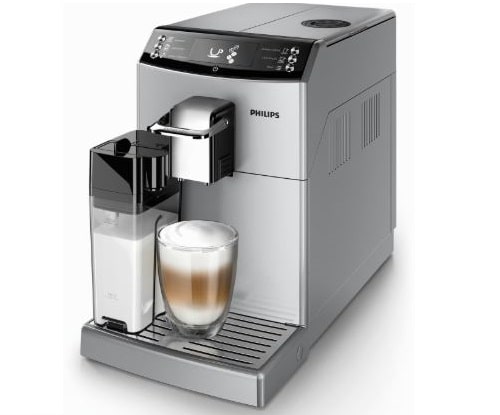
Espresso Coffee Machine 3100 Series

This chapter summarizes the most common problems you could encounter with your machine. If you are unable to solve the problem with the information below, visit www.philips.com/support for a list of frequently asked questions or contact the Philips hotline in your country. Contact details can be found in the warranty booklet supplied separately or at www.philips.com/support.
| Error Code | Solution |
|---|---|
| Error Code 1 Coffee grinder blocked. | Coffee outlet duct clogged. Thoroughly clean the coffee outlet duct as described in the “Weekly Cleaning of the Brew Group” chapter. |
| Error Code 3-4 The brew group is blocked and cannot be pulled out. | The brew group is out of place. Close the service door. Turn off and back on the machine. The brew group automatically returns to the initial position. |
| Error Code 5 Water circuit error. | Air in the water circuit. Remove and put back the water tank a few times, making sure it is properly reinserted. Check that the water tank compartment is clean. If the Intenza+ fi lter is installed, remove it. Turn off and back on the machine. When the machine is ready for use, put the fi lter back. |
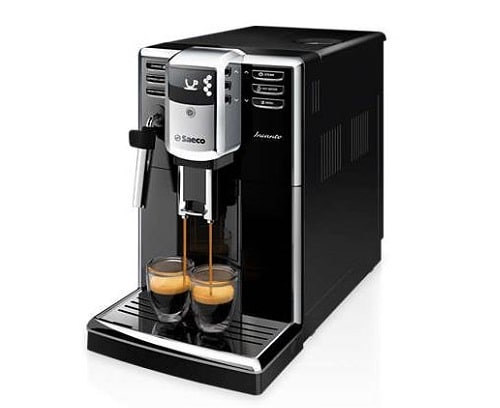
Saeco Intelia Espresso Machine
| Error Code | Solution |
|---|---|
| 01 | The coffee grinder is blocked. The coffee exit duct is clogged. Clean the coffee exit duct thoroughly with the handle of the measuring spoon or a spoon handle. Switch the appliance off and on again. |
| 03 - 04 | There is a problem with the brew group. The brew group is dirty. Remove the brew group and clean it thoroughly. |
| 05 | There is a water circuit problem. There is air in the water circuit. Remove and place back the water tank a couple of times. Make sure you insert it into the machine properly. Check if the water tank compartment is clean. If you use an AquaClean filter: remove the AquaClean filter from the water tank and shake it to remove all air from the filter. Then place the AquaClean filter back into the water tank. |
| 14 | The machine is overheated. This can have several causes. Switch the machine off and switch it back on again after 30 minutes. Try this 2 or 3 times. |
Saeco Minuto Espresso Machine
| Error Code | Solution |
|---|---|
| 01 | The coffee grinder is blocked (grinder blades jammed or sensor not reading properly) |
| 03 | The brewing unit is blocked in work position (microswitch not released in up position after 3", torque error trying to move down, descent time out exceeded) |
| 04 | The brewing unit is blocked in home position (microswitch not released in down position after 3", torque error trying to move up, ascent time out exceeded) |
| 05 | Water circuit / fl ow meter problems (water circuit blocked or no fl ow meter signal) |
| 10 | Boiler temperature sensor short circuited |
| 11 | Boiler temperature sensor open circuit |
| 14 | The boiler temperature has exceeded the maximum allowed value (165°c) |
| 15 | The boiler temperature has not increased by x°C in y sec (boiler power supply disconnected, incorrect boiler fi tted must be a 1300W boiler, partial power supply to boiler, cut out thermostat tripped) |
| 19 | Mains voltage trouble |
| 22 | interface missing or unknown |
Espresso Machine Troubleshooting
This chapter summarizes the most common problems you could encounter with the machine.
| Trouble | Cause and Solution |
|---|---|
| The machine does not switch on. | The machine is disconnected or the main switch is in the 'off' position (0). Check if the mains cord is inserted correctly. |
| Make sure the main switch is set to 'on' position (I). | |
| The machine is in DEMO mode. | You pressed the standby button for more than 8 seconds. Switch the machine off and then on again with the main switch on the back of the machine. |
| The drip tray fills up quickly. | This is normal. The machine uses water to rinse the internal circuit and brew group. Some water flows through the internal system directly into the drip tray. Empty the drip tray when the 'drip tray full' indicator pops up through the drip tray cover. |
| Place a cup under the dispensing spout to collect rinsing water. | |
| The 'coffee grounds container full' icon remains displayed. | You emptied the coffee grounds container while the machine was switched off. Always empty the coffee grounds container while the machine is switched on. If you empty the coffee grounds container when the machine is switched off, the coffee cycle counter is not reset. In that case, the 'empty coffee grounds container' message stays on the display even though the container is not full. |
| You placed back the coffee grounds container too fast. Do not place back the coffee grounds container until the display message prompts you to put it back. | |
| I cannot remove the brew group. | w group. The brew group is not in the correct position. Close the service door. Switch the machine off and back on again. Wait for the 'machine ready' screen to appear and then remove the brew group. |
| You have not removed the coffee grounds container. Remove the coffee grounds container before you remove the brew group. | |
| I cannot insert the brew group. | The brew group is not in the correct position. You did not put the brew group in the correct position before placing it back. Make sure that the lever is in contact with the base of the brew group and that the hook of the brew group is in the correct position. |
| Reset the machine in the following way: place the drip tray and the coffee grounds container back. Leave the brew group out. Close the service door and switch the machine on and off. Then try to reinsert the brew group. | |
| The machine is still in the descaling procedure. You cannot remove the brew group when the descaling procedure is active. First complete the descaling process and then remove the brew group. | |
| The coffee has too little crema or is watery. | The grinder is set to a too coarse setting. Adjust the grinder to a finer setting. |
| The coffee blend is not the correct one. Change the coffee blend. | |
| The machine is performing its self-adjustment procedure. Brew a few cups of coffee. | |
| The brew group is dirty. Clean the brew group. | |
| Coffee is leaking from the coffee dispensing spout. | The coffee dispensing spout is clogged. Clean the coffee dispensing spout and its holes with a pipe cleaner. |
| The coffee exit duct is clogged. Clean the coffee exit duct. | |
| The coffee is not hot enough. | The cups you use are cold. Preheat the cups by rinsing them with hot water. |
| The temperature is set too low. Check the menu settings. Set the temperature to 'high' in the menu. | |
| You added milk. Whether the milk you add is warm or cold, it always decreases the temperature of the coffee to some extent. | |
| The machine grinds the coffee beans, but coffee does not come out. | The coffee exit duct is blocked. Clean the coffee exit duct with the handle of the measuring spoon or a spoon handle. Switch the appliance off and on again. |
| The grinder is set to a too fine setting. Adjust the grinder to a coarser setting. | |
| The brew group is dirty. Clean the brew group. | |
| The coffee dispensing spout is dirty. Clean the coffee dispensing spout and its holes with a pipe cleaner. | |
| The coffee comes out slowly. | The grinder is set to a too fine setting. Use a different coffee blend or adjust the grinder. |
| The brew group is dirty. Clean the brew group. | |
| The coffee exit duct is blocked. Clean the coffee exit duct with the handle of the measuring spoon or a spoon handle. | |
| The machine circuit is blocked by limescale. Descale the machine. | |
| The frothed milk is too cold. | The cups are cold. Preheat the cups with hot water. |
| The milk does not froth. | The classic milk frother is dirty or not assembled correctly. Clean the classic milk frother and make sure it is correctly assembled. |
| The type of milk used is not suitable for frothing. Different types of milk result in different amounts of froth and different froth qualities. We have tested the following milk types which proved to deliver a good milk froth result: semi-skimmed or full-fat cow's milk, soy milk and lactosefree milk. Other types of milk have not been tested and may result in a small amount of milk froth. | |
| I cannot activate the AquaClean filter and the machine asks for descaling. | You have already replaced the AquaClean filter 8 times. After you have replaced the AquaClean filter 8 times, you need to descale the machine. Descale your machine first and install the AquaClean filter. Always activate the AquaClean filter in the menu (see 'Activating the AquaClean filter'). Also do this when you replace the filter. |
| The filter has not been replaced in time after the AquaClean filter icon flashed and the capacity dropped to 0%. Descale your machine first and then install the AquaClean filter. | |
| You did not install the AquaClean filter during first installation, but after having brewed approx. 50 coffees (based on 100ml cups). The machine has to be completely limescale-free before you install the AquaClean filter. First descale the machine and then install a new AquaClean filter. After descaling, the filter counter is reset to 0/8. Always confirm filter activation in the machine menu. Also do this after filter replacement. | |
| You did not activate the new or replaced AquaClean filter in the machine menu. Also after replacing the filter, you need to confirm activation in the machine menu. Descale your machine first. Then activate the AquaClean filter in the menu (see 'Activating the AquaClean filter'). Also do this when you replace the filter. | |
| The AquaClean filter icon does not appear on the display after I replaced the filter | You did not confirm activation in the machine menu. Confirm the activation of the filter in the machine menu. (see 'Activating the AquaClean filter') If the display shows 'START CALC CLEAN', you first need to descale the machine. Remove the AquaClean filter before descaling and reinsert it afterwards. |
| The AquaClean filter is installed, but the descaling message appears. | You have not activated the AquaClean filter in the machine menu. First descale the machine and then install a new AquaClean filter. This will reset the filter counter to 0/8. Always confirm filter activation in the machine menu (see 'Activating the AquaClean filter'), also after filter replacement |
| The AquaClean filter does not fit. | You need to remove air from the filter. Let air bubbles come out of the filter. |
| There is still water in the water tank. Empty the water tank before you install the filter. | |
| You are trying to install another filter than the AquaClean filter. Only the AquaClean filter fits into the machine. | |
| The rubber o-ring is not attached to the AquaClean filter. Check the packaging for the o-ring and attach it to the AquaClean filter. | |
| There is water under the machine. | The drip tray is too full and has overflowed. Empty the drip tray when the 'drip tray full' indicator pops up through the drip tray. Always empty the drip tray before you start descaling the machine. |
| The machine is not placed on a horizontal surface. Place the machine on a horizontal surface so that the 'drip tray full' indicator works properly. |
What to do if the descaling procedure is interrupted?
Once the descaling procedure has started, you must let the machine perform the entire procedure until the very end without switching off the machine. If the machine gets stuck during descaling, you can exit the descaling procedure by pressing the standby button. If this occurs, or in case of a power failure or accidental disconnection of the cord, do the following:
- Empty and rinse the water tank thoroughly.
- Fill the water tank up to the CALC CLEAN level indication and switch the machine back on. The machine will heat up and perform an automatic rinsing cycle.
- Before brewing any beverages, perform a manual rinsing cycle.
Note: If the descaling procedure was not completed, the machine will require another descaling procedure as soon as possible.