Xerox printers can encounter various error codes. These codes assist users in quickly identifying issues. Printers commonly indicate several common problems with these codes, facilitating easier problem diagnosis. Users can swiftly pinpoint their issues and perform necessary repairs using these codes. Error codes are crucial for the sustainability of printer performance and business efficiency.
Codes Table
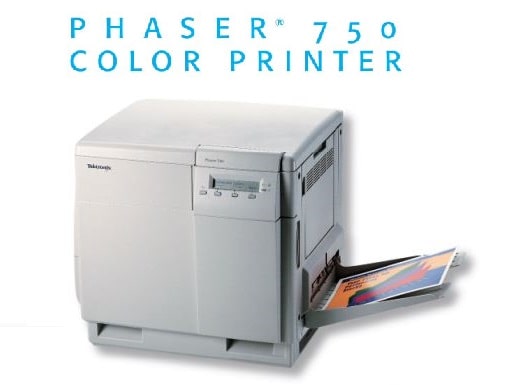
Printer 750 Series Codes
| Error Codes | Solution |
|---|---|
| 01 | *Remove and re-install the black Toner Cartridge, then turn the printer off and on. *Replace the black Toner Cartridge, then turn the printer off and on. |
| 02 | *Remove and re-install the cyan Toner Cartridge, then turn the printer off and on. *Replace the cyan Toner Cartridge, then turn the printer off and on. |
| 03 | *Remove and re-install the magenta Toner Cartridge, then turn the printer off and on. *Replace the magenta Toner Cartridge, then turn the printer off and on. |
| 04 | *Remove and re-install the yellow Toner Cartridge, then turn the printer off and on. *Replace the yellow Toner Cartridge, then turn the printer off and on. |
| 05 | Turn the printer power off, then on. |
| 10 | Turn the printer power off, then on. |
| 11 | Turn the printer power off, then on. |
| 12 | Turn the printer power off, then on. |
| 13 | Turn the printer power off, then on. |
| 20 | *Remove and re-install the Imaging Unit (make sure that Imaging Unit is locked in place). Turn the printer off, then on. *Remove and re-install the Main Charge Grid. Turn the printer off, then on. *Remove and re-install the Transfer Kit. Turn the printer off, then on. *Remove and re-install each of the Toner Cartridges. Turn the printer off, then on. *Replace the Main Charge Grid. Turn the printer off, then on. *Replace the Imaging Unit (make sure that Imaging Unit is locked in place). Turn the printer off, then on. *Replace the Transfer Kit. Turn the printer off, then on. *Replace the Toner Cartridges. Turn the printer off, then on. |
| 21 | *Remove and re-install the Imaging Unit (make sure that Imaging Unit is locked in place). Turn the printer off, then on. *Replace the Imaging Unit (make sure that Imaging Unit is locked in place). Turn the printer off, then on. *If a problem persists for Error 30, clean the sensor. |
| 22 | *Remove and re-install the Imaging Unit (make sure that Imaging Unit is locked in place). Turn the printer off, then on. *Replace the Imaging Unit (make sure that Imaging Unit is locked in place). Turn the printer off, then on. *If a problem persists for Error 30, clean the sensor. |
| 30 | *Remove and re-install the Imaging Unit (make sure that Imaging Unit is locked in place). Turn the printer off, then on. *Replace the Imaging Unit (make sure that Imaging Unit is locked in place). Turn the printer off, then on. *If a problem persists for Error 30, clean the sensor. |
| 32 | *Remove and re-install the Imaging Unit (make sure that Imaging Unit is locked in place). Turn the printer off, then on. *Replace the Imaging Unit (make sure that Imaging Unit is locked in place). Turn the printer off, then on. *If a problem persists for Error 30, clean the sensor. |
| 33 | *Check for jammed paper throughout the paper path (especially in paper feeder). *Remove and re-install the paper feeder and Transfer Kit. Turn the printer off, then on. |
| 40 | *Check for jammed paper in the Fuser. Re-install the Fuser. Turn the printer off, then on. *Make sure that you have the correct Fuser for your local printer power supply: 110-Volt Fuser Part Number 016-1839-00 220-Volt Fuser Part Number 016-1840-00 *Replace the Fuser. Turn the printer off, then on. |
| 41 | *Check for jammed paper in the Fuser. Re-install the Fuser. Turn the printer off, then on. *Make sure that you have the correct Fuser for your local printer power supply: 110-Volt Fuser Part Number 016-1839-00 220-Volt Fuser Part Number 016-1840-00 *Replace the Fuser. Turn the printer off, then on. |
| 42 | *Check for jammed paper in the Fuser. Re-install the Fuser. Turn the printer off, then on. *Make sure that you have the correct Fuser for your local printer power supply: 110-Volt Fuser Part Number 016-1839-00 220-Volt Fuser Part Number 016-1840-00 *Replace the Fuser. Turn the printer off, then on. |
| 43 | *Check for jammed paper in the Fuser. Re-install the Fuser. Turn the printer off, then on. *Make sure that you have the correct Fuser for your local printer power supply: 110-Volt Fuser Part Number 016-1839-00 220-Volt Fuser Part Number 016-1840-00 *Replace the Fuser. Turn the printer off, then on. |
| 50 | Turn the printer off, then on. |
| 51 | Turn the printer off, then on. |
| 52 | *Remove the Duplex Unit (if installed). *Check for paper under the Upper Tray. *Turn power off, then on. |
| 53 | *Open left door and remove any jammed media. *Tun the printer off, then on. |
| 60 | *Remove the media from the Multi-Purpose Tray. Turn the printer off, then on. *Reinstall the media. Make sure you do not overfill the tray. |
| 61 | *Remove and re-install each Toner Cartridge. Turn the printer off, then on. *Replace each Toner Cartridge. Turn the printer off, then on. |
| 62 | *Check for jammed paper throughout the paper path (especially in the paper feeder and Fuser). *Remove and re-install the Fuser. Turn the printer off, then on. *Slide out and re-insert the paper feeder. Turn the printer off, then on. *Replace the Fuser. Turn the printer off, then on. |
| 63 | *Remove and re-install the Imaging Unit. Turn the printer off, then on. *Replace the Imaging Unit. Turn the printer off, then on. |
| 70 | Turn the printer off, then on. |
| 71 | Turn the printer off, then on. |
| 72 | Turn the printer off, then on. |
| 73 | *Remove and re-install the Imaging Unit. Turn the printer off, then on. *Replace the Imaging Unit. Turn the printer off, then on. |
| 74 | *Remove and re-install the Fuser. Turn the printer off, then on. *Replace the Fuser. Turn the printer off, then on. |
| 80 | *Make sure that all four toner cartridges are installed in the printer. *Turn the printer off, then on. |
| 81 | *Make sure that all four toner cartridges are installed in the printer. *Turn the printer off, then on. |
| 82 | *Make sure that all four toner cartridges are installed in the printer. *Turn the printer off, then on. |
| 83 | *Make sure that all four toner cartridges are installed in the printer. *Turn the printer off, then on. |
| 84 | *Make sure that all four toner cartridges are installed in the printer. *Turn the printer off, then on. |
| 01p | Make sure that installed memory DIMM(s) are compatible with printer's image processor board and that they are installed in the proper slot(s). |
| 47p | Make sure that installed memory DIMM(s) are compatible with printer's image processor board and that they are installed in the proper slot(s). |
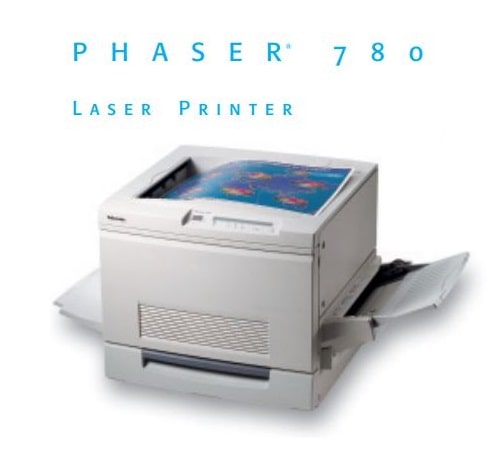
Printer 780 Series Codes
If the printer’s front panel flashes a message alternating with Error XX, find the error code in this table and follow the instructions for resolving the problem.
| Error Codes | Solution |
|---|---|
| Printer Maintenance Required Soon [no error code is displayed] | Contact Customer Support. (Note that the printer will continue to print.) |
| 10 | Laser Unit Error. Turn the printer power off, then on. |
| 11 | Image Density Error. *Turn the printer power off, then on. *Replace Imaging Unit. Turn the printer off, then on. |
| 12 | Image Density Error. *Turn the printer power off, then on. *Replace Imaging Unit. Turn the printer off, then on. |
| 13 | Density Calibration Error. Turn the printer power off, then on. |
| 21 | Turn the printer power off, then on |
| 22 | Turn the printer power off, then on |
| 23 | Turn the printer power off, then on |
| 24 | Turn the printer power off, then on |
| 40 | Fuser Temperature Error. Open the fuser drawer on the bottom left of the printer, then close it. Turn the printer power off, then on. |
| 41 | Fuser Temperature Error. Open the fuser drawer on the bottom left of the printer, then close it. Turn the printer power off, then on. |
| 42 | Fuser Temperature Error. Open the fuser drawer on the bottom left of the printer, then close it. Turn the printer power off, then on. |
| 43 | Fuser Temperature Error. Open the fuser drawer on the bottom left of the printer, then close it. Turn the printer power off, then on. |
| 44 | Fuser Temperature Error. Open the fuser drawer on the bottom left of the printer, then close it. Turn the printer power off, then on. |
| 61 | Process Motor Error. Turn the printer power off, then on. |
| 62 | Paper Handling Motor *Check for and clear paper jams. *Open the paper feed unit on the right side of the printer, then close it. *Turn the printer power off, then on. |
| 70 | Imaging Unit ID Error. *Remove and reinstall the Imaging Unit. Turn the printer off, then on. *Replace the Imaging Unit. Turn the printer off, then on. |
| 71 | Imaging Unit ID Error. *Remove and reinstall the Imaging Unit. Turn the printer off, then on. *Replace the Imaging Unit. Turn the printer off, then on. |
| 72 | Imaging Unit Count Error *Remove and reinstall the Imaging Unit. Turn the printer off, then on. *Replace the Imaging Unit. Turn the printer off, then on. |
| 73 | *Replace the Imaging Unit. Turn the printer off, then on. |
| 74 | *Replace the Imaging Unit. Turn the printer off, then on. |
| 75 | *Replace the Imaging Unit. Turn the printer off, then on. |
| 76 | Engine Board Error. Turn the printer off, then on. |
| 77 | Engine Board Error. Turn the printer off, then on. |
Workcentre 6400 Series Codes

Soft Faults: Soft faults are events that occur within the system and, in most cases cause no disruption to the operation of the printer. The system automatically recovers from these events and no action is required by service.
Hard Faults: Hard faults are events that occur within the system that shut down one or more functions within the printer and require service for corrective action.
The Fault Codes Summary table lists possible errors, along with the corresponding code, and page reference for the corrective procedure.
| Fault Code | Fault Description |
|---|---|
| 301.510.00 | The Front Door is Open |
| 302.302.00 | Rewrite Failure |
| 302.306.00 | Erase Failure |
| 302.308.00 | Download Invalid |
| 302.315.00 | Service Registry bad or corrupted data |
| 302.316.00 | SRS returns invalid or missing data |
| 302.317.00 | LUI gets no response from SRS |
| 302.320.00 | UI Data Time Out Error |
| 302.390.00 | Config Services not stable |
| 302.321.00 | XEIP browser does not respond or is dead |
| 303.301.00 | Engine Flash ROM (Write) Failure |
| 303.302.00 | Engine Flash ROM (Erase) Failure |
| 303.303.00 | Engine Board Failure |
| 303.304.00 | Disk Failure |
| 319.300.00 | Unable to read from Image Disk |
| 319.301.00 | Unable to write to Image Disk |
| 319.302.00 | Bad data received from Disk |
| 319.303.00 | Unable to format Image Disk |
| 319.310.00 | Disk system capacity fault |
| 303.305.00 | Engine NVRAM Failure 1 |
| 303.308.00 | Engine NVRAM Failure 2 |
| 303.310.00 | Error, Cause Unknown |
| 303.316.00 | Communication Fault |
| 303.317.00 | Error saving critical IOT NVM |
| 303.318.00 | Error initializing IOT NVM |
| 303.319.00 | Error restoring critical IOT NVM |
| 303.325.00 | Wall Clock Fault |
| 303.330.00 | Upgrade failed. Security Feature Active |
| 303.338.00 | CCM Reset |
| 303.355.00 | CCM POST failure. NVM battery may be dead. |
| 303.401.00 | Basic FAX not detected/ confirmed |
| 303.789.00 | Error Autosaving Copy Controller NVM |
| 304.001.00 | Ozone Fan Failure |
| 304.002.00 | Power Supply (LVPS) Fan Failure |
| 304.003.00 | Finisher Fan Failure |
| 304.486.00 | Jam at Output Tray (No Finisher) |
| 305.161.00 | Jam at Document Feeder |
| 305.162.00 | Jam at Document Feeder (Output) |
| 305.163.00 | Jam at Document Feeder (Duplex) |
| 305.164.00 | Jam at Document Feeder (Misfeed) |
| 314.004.00 | Pick Up Roller Error |
| 305.165.00 | Scanner DRAM Test Failure |
| 305.166.00 | Home Position Test Failure |
| 305.168.00 | Optical Test Failure |
| 314.001.00 | IIT Home Position Error |
| 315.007.00 | Internal Target Error |
| 315.008.00 | IIT Optical Error |
| 305.167.00 | Lock Check Failure |
| 314.003.00 | Scan Head Locked |
| 305.169.00 | Scanner Cooling Fan is malfunctioning. |
| 305.194.00 | Size mismatch Jam using “slow scan mixed signals.” |
| 305.196.00 | Size mismatch Jam using “no mixed sized signals.” |
| 305.197.00 | Unsupported original size detected |
| 305.274.00 | ADF Original Size detection sensor failure. |
| 308.001.00 | 1st Feeder Transfer Roller Contact Failure |
| 308.002.00 | 2nd Transfer Roller Contact Failure |
| 308.101.00 | Jam at Tray 1 (MPT) |
| 308.102.00 | Jam at Right Door/ Feed Cassette (Tray 2) |
| 308.103.00 | Jam at Paper Transport/ Feed Cassette (Tray 3) |
| 308.104.00 | Jam at Paper Transport/ Feed Cassette (Tray 4) |
| 308.105.00 | Jam at Duplex |
| 310.104.00 | Jam at Re-feeding Area |
| 309.001.00 | Laser Unit Failure |
| 309.002.00 | Laser Unit Polygon Motor Failure |
| 309.003.00 | Black Developer Motor Failure |
| 309.004.00 | Color Developer Motor Failure |
| 309.005.00 | Color Print Cartridge (IU) Motor Failure |
| 309.006.00 | Black Print Cartridge (IU) Motor Failure |
| 309.007.00 | Cyan Imaging Unit Failure |
| 309.008.00 | Magenta Imaging Unit Failure |
| 309.009.00 | Yellow Imaging Unit Failure |
| 309.010.00 | Black Imaging Unit Failure |
| 309.011.00 | IDC Sensor Board Error (Front) |
| 309.012.00: | IDC Sensor Board Error (Rear) |
| 309.013.00 | Color Registration Error Correction - Internal Test Pattern |
| 309.014.00 | Color Registration Error Correction - Correction Amount |
| 310.102.00 | Jam at Horizontal Transfer Door |
| 310.103.00 | Jam at 2nd Image Transfer Roller |
| 310.105.00 | Jam at Vertical Transport Area |
| 310.106.00 | Jam at Fuser |
| 310.301.00 | Fuser Warm-Up Time Failure (Thermal Heater) |
| 310.302.00 | Fuser Warm-Up Time Failure (Pressure Roller) |
| 310.303.00 | Fuser Temperature Too Low (Thermal Heater) |
| 310.304.00 | Fuser Temperature Too Low (Pressure Roller) |
| 310.305.00 | Fuser Temperature Too High (Thermal Heater) |
| 310.306.00 | Fuser Temperature Too High (Pressure Roller) |
| 310.307.00 | Fuser Fan Failure |
| 310.308.00 | Fuser Motor Failure |
| 312.098.00 | Finisher Flash ROM Failure |
| 312.099.00 | Finisher Communication Failure |
| 312.480.00 | Finisher Elevation Drive Failure |
| 312.481.00 | Finisher Paper Press Drive Failure |
| 312.482.00 | Finisher Alignment Plate Drive Failure |
| 312.483.00 | Finisher Eject Roller Contact Failure |
| 312.484.00 | Finisher Storage Belt Contact Failure |
| 312.485.00 | Finisher Bundle Eject Motor Failure |
| 312.487.00 | Jam at Finisher Transport Area |
| 312.488.00 | Jam at Finisher Upper Output Tray |
| 312.489.00 | Jam at Finisher Stacker Output Tray |
| 312.491.00 | Stapler Jam |
| 314.002.00 | Scanner Missing |
| 362.010.00 | IISS/ Scanner - Controller Communication Fail |
| 314.005.00 | Document Feeder Disconnected |
| 315.009.00 | IIT Manual Calibration Fail |
| 315.010.00 | IIT Manual Calibration Fail - Lead Edge Fail |
| 315.011.00 | IIT Manual Calibration Fail - Side Edge Fail |
| 315.012.00 | IIT Manual Calibration Fail - Shading Target Fail |
| 319.403.00 | Out of Memory - Job in EPC |
| 320.302.00 | Fax Card Hardware or Software Error |
| 320.303.00 | Fax Card Hardware or Software Error |
| 320.305.00 | Fax Card Hardware or Software Error |
| 320.701.00 | Phone Book Download Failed |
| 322.371.00 | Fax Application Registration Error |
| 322.372.00 | Fax application Un-registration Error |
| 320.320.00 | Unrecoverable Fax Fault not cleared by Card Reset |
| 320.322.00 | NV Device not fitted to Basic Fax Card |
| 320.323.00 | Fax System Memory is Low |
| 320.324.00 | Not Enough Memory to use Fax Service |
| 320.327.00 | Registers cannot be accessed on the Extended Card |
| 320.339.00 | Basic Card Problem |
| 320.341.00 | Miscellaneous Basic Card Problem |
| 320.342.00 | Error Accessing File on NVM Device |
| 320.331.00 | No Communication via PSTN1 port |
| 320.338.00 | Fax Communication Error at Power Up or Re-boot |
| 320.350.00 | No Dial Tone Warning |
| 320.351.00 | No Dial Tone Error |
| 322.370.00 | Unable to communicate with XSA Database |
| 322.750.00 | Output Device Configuration Mismatch |
| 342.045.00 | Print Board Control Fan has an error and is Off. |
| 377.305.00: | Tray 3 Right Side Door is Open |
| 377.306.00 | Tray 4 Right Side Door is Open |
| 377.307.00 | Duplex Door is Open |
| 377.308.00 | Finisher Top Door is Open |
| 377.309.00 | Control Panel Door Open |
| 377.311.00 | Document Feeder Cover Open |
| 377.312.00 | Right Side Door Open |
| 377.313.00 | Communication error with Duplex Unit, may be disconnected or not installed |
| 377.314.00 | Communication Error with Tray 1 Assembly |
| 391.313.00 | CRUM ASIC Comm Fail |
| 391.320.00 | CC Wire Cut Fail |
Troubleshooting
This section contains procedures to help you locate and resolve problems. Some problems can be resolved by simply restarting the printer.
Printer Does Not Turn On
- The power switch is not correctly turned on. Turn off the printer using the power switch visible on the lower center tray. Wait two minutes, then turn the printer on. Ensure that the main power switch behind the front cover of the printer is in the on position.
- The power cord is not correctly plugged into the outlet. Turn off the printer, and plug the power cord securely into the outlet.
- Something is wrong with the outlet connected to the printer. Plug another electrical appliance into the outlet and see whether it operates properly. Try a different outlet.
- The printer is connected to an outlet with a voltage or frequency that does not match the printer specifications.
Printing Takes Too Long
- The printer is set to a slower printing mode (for example, heavyweight stock). It takes more time to print with special media. Make sure that the media type is set properly in the printer driver and at the printer control panel.
- The printer is in power saving mode. It takes time for printing to start in power saving mode.
- The job is very complex. Wait. No action needed.
Printer Resets or Turns Off Frequently
- The power cord is not correctly plugged into the outlet. Turn off the printer, confirm that the power cord is correctly plugged into the printer and the outlet, then turn on the printer.
- A system error occurred. Contact your local Xerox service representative with the fault information.
Printer Is Making Unusual Noises
- The tray is not installed correctly. Open and close the tray you are printing from.
- There is an obstruction or debris inside the printer. Turn off the printer and remove the obstruction or debris. If you cannot remove it, contact your Xerox service representative.
2-Sided Printing Problems
Media or settings are not correct. Make sure that you are using correct media. For details, see Supported Media on page 51. Envelopes, labels, gloss, and extra heavyweight stock cannot be used for 2-Sided Printing. In the printer driver, choose 2-Sided Printing.
Scanner Error
Scanner is not communicating. Turn off the printer using the power switch visible on the lower center tray. Wait two minutes, then turn the printer on. If the problem is not resolved, contact your local Xerox service representative.