Common error codes in Thermador range provide crucial insights for users to manage their devices more effectively, offering valuable information for troubleshooting.
Codes List
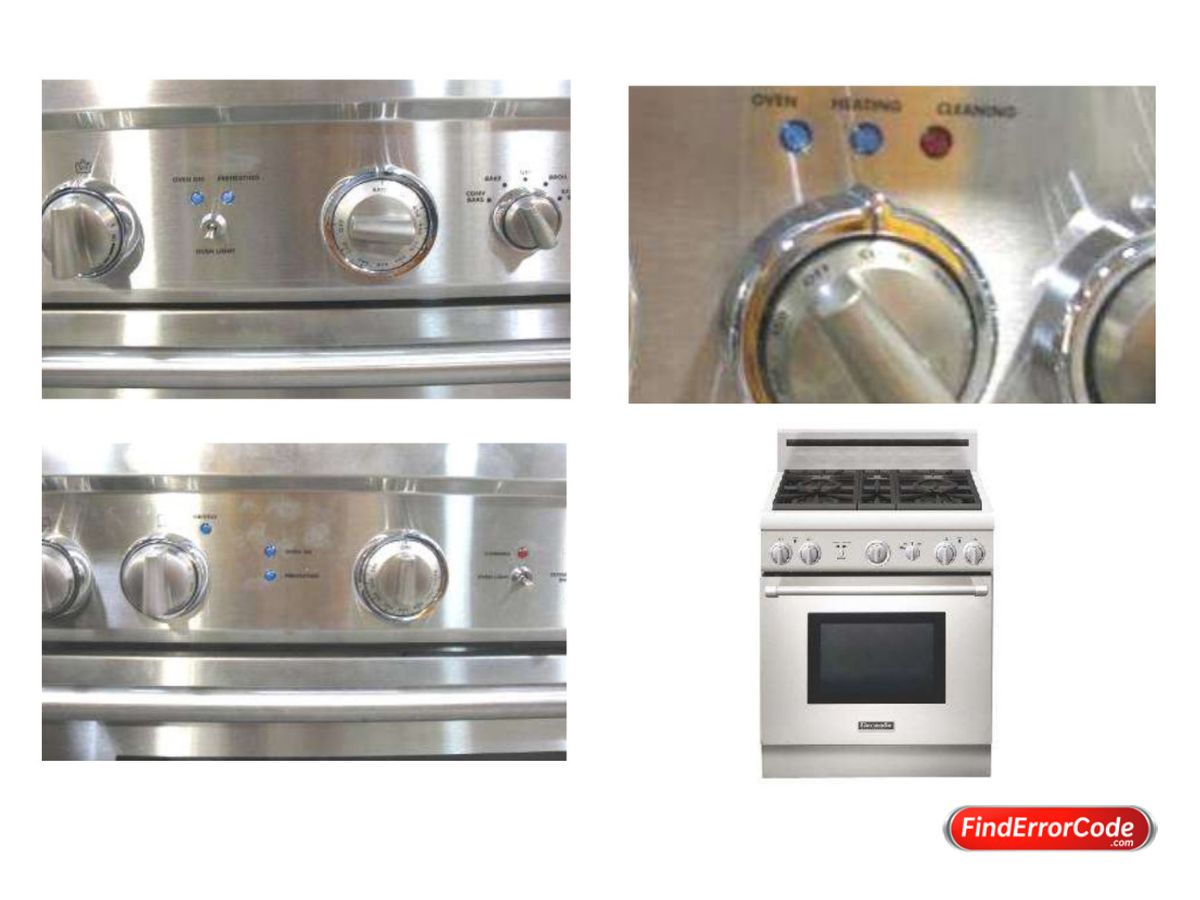
When a fault is detected, this appliance will display a fault code. The fault codes are represented by the manner in which two blue LED indicators are blinking. Depending on the range model, the blue LEDs that blink are located either horizontally or vertically on the control panel. The horizontal positioned blue LEDs will first blink on the left and then the right, and the vertical positioned blue LEDs will first blink on the top and then the bottom. For example, if the first LED blinks 4 consecutive times followed immediately by the second LED blinking 3 times, that represents a fault code of 43 on the chart.
01: Control not calibrated. Both ovens are off. Replace control board.
10: Temperature sensor – open circuit. Affected oven is off.
11: Expansion board not connected. Secondary oven disabled.
12: Temperature sensor – short circuit. Affected oven is off.
13: Vcc lift-off error (input voltage error). Both ovens are off. Oven must be on to display fault code.
21: Potentiometer failure. Affected oven is off.
22: EEPROM error. Both ovens are off. Replace control board.
23: Over temperature while cleaning (Over 900 F). Clean function is stopped.
32: Over temperature while cooking (Over 625 F). Affected oven is off.
43: Cooling fan not operating. Clean function is stopped. Oven must be on to display fault code.
44: Door latch fault. Clean function is stopped.
55: Selector switch error. Affected oven is off.
Parts Meaning
Troubleshooting
| Symptom | Possible Cause and Remedy |
|---|---|
| Intermittent igniter sparking | Ceramic igniter is wet or dirty. Carefully dry or clean igniter. |
| More than four clicks of igniter before lighting | Improper fit of burner cap onto burner base. Align burner cap properly on burner base. |
| Constant igniter sparking | Range is not properly grounded. Have a qualified electrician ground the range properly. |
| Igniters sparking but no flame ignition | Gas supply valve is in “OFF” position. Restore gas supply to the unit. |
| Range will not operate (lights, oven, and surface burners will not come on) | No power to the unit. Check for open circuit breaker. |
| Oven operates on bake but fails to operate on timed bake | Timer improperly set. Set timer as outlined in the Use and Care Guide. |
| ERROR COMM message | To ensure customer safety in the event of power failure, the unit will display an error message upon reinstatement of power unless all oven knobs are set to OFF. Set all oven knobs to OFF and reset the breaker to clear the message. |
| Oven light fails to come on | Oven light burned out. Replace the oven light as outlined in the Use and Care Guide. |
| Door will not open | Oven is still in self-clean mode. If oven is hot, door latch will release when safe temperature is reached. |
| Foods in oven are not cooking sufficiently | Rack position is incorrect. See the Using the Oven section of the Use and Care Guide. |
| Hot air is coming from the appliance | It is normal for the cooling process to push heated air out into the room when the oven is on. This is normal. |
Care and Maintenance
Range Cleaning
When Cleaning This Range:
- Use the mildest cleaning procedure that will do the job efficiently and effectively. Some cleaners of the same type are harsher than others. Try on a small inconspicuous area first.
- Always rub metal finishes in the direction of the polish lines for maximum effectiveness and to avoid marring the surface.
- Use only clean soft cloths, sponges, paper towels, fibrous brushes, plastic, non-metal or steel wool soap pads for cleaning and scouring, as recommended on the chart.
- Most exterior parts of this appliance can be cleaned with hot sudsy water (except the various items specifically identified otherwise). When rinsing is required, rinse thoroughly.
- Always wipe dry immediately to avoid water marks.
- Do not use chlorine based cleaners.
Lock
When the CLEAN cycle starts, the automatic door lock cycle begins. The temperature gauge begins to move to CLEAN five minutes after the clean mode is initiated. Check the door to confirm that it is locked. You can stop the clean cycle by selecting the OFF position.
Manual Pdf
Thermador Professional Pro Grand Ranges – Use And Care Guide PRD364JDGU PDF
see more: thermador.com